
Správa více agentů
Pokud potřebujete chatbota na více webech nebo na různých částech jednoho webu, doporučujeme pro každý případ vytvořit samostatného agenta. Každý agent má vlastní skript, vlastní zdroje dat a vlastní konfiguraci. Druhého agenta využijete i jako testovací prostředí vedle live bota — viz Správa agentů.
1. Kdy použít více agentů
- Různé weby pro různé země nebo jazyky — každý web má svého agenta nastaveného pro daný jazyk a region, s vlastními zdroji dat v tom jazyce. Takový agent odpovídá přesněji než jeden vícejazyčný agent sdílející zdroje ze všech zemí.
- Různé sekce jednoho webu — například oddělení zákaznické podpory a oddělení pro obchodní partnery na stejném webu. Každý agent pak pracuje jen s relevantními daty a nezobrazuje informace určené druhé skupině.
- Testování změn mimo live bota — Playground není oddělené staging prostředí. Vytvořte testovacího agenta, sdílejte s ním data live bota a laděte nastavení bez dopadu na web.
2. Jak vytvořit nového agenta
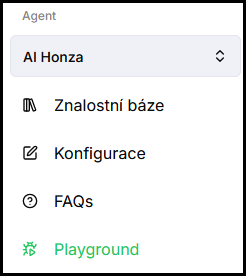
- V levém menu klikněte na dropdown s názvem aktuálního agenta (pod položkou Agent).
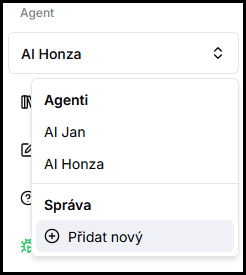
- V dropdown menu klikněte na Přidat nový.
- Otevře se konfigurace nového agenta s výchozím názvem a výchozím nastavením.
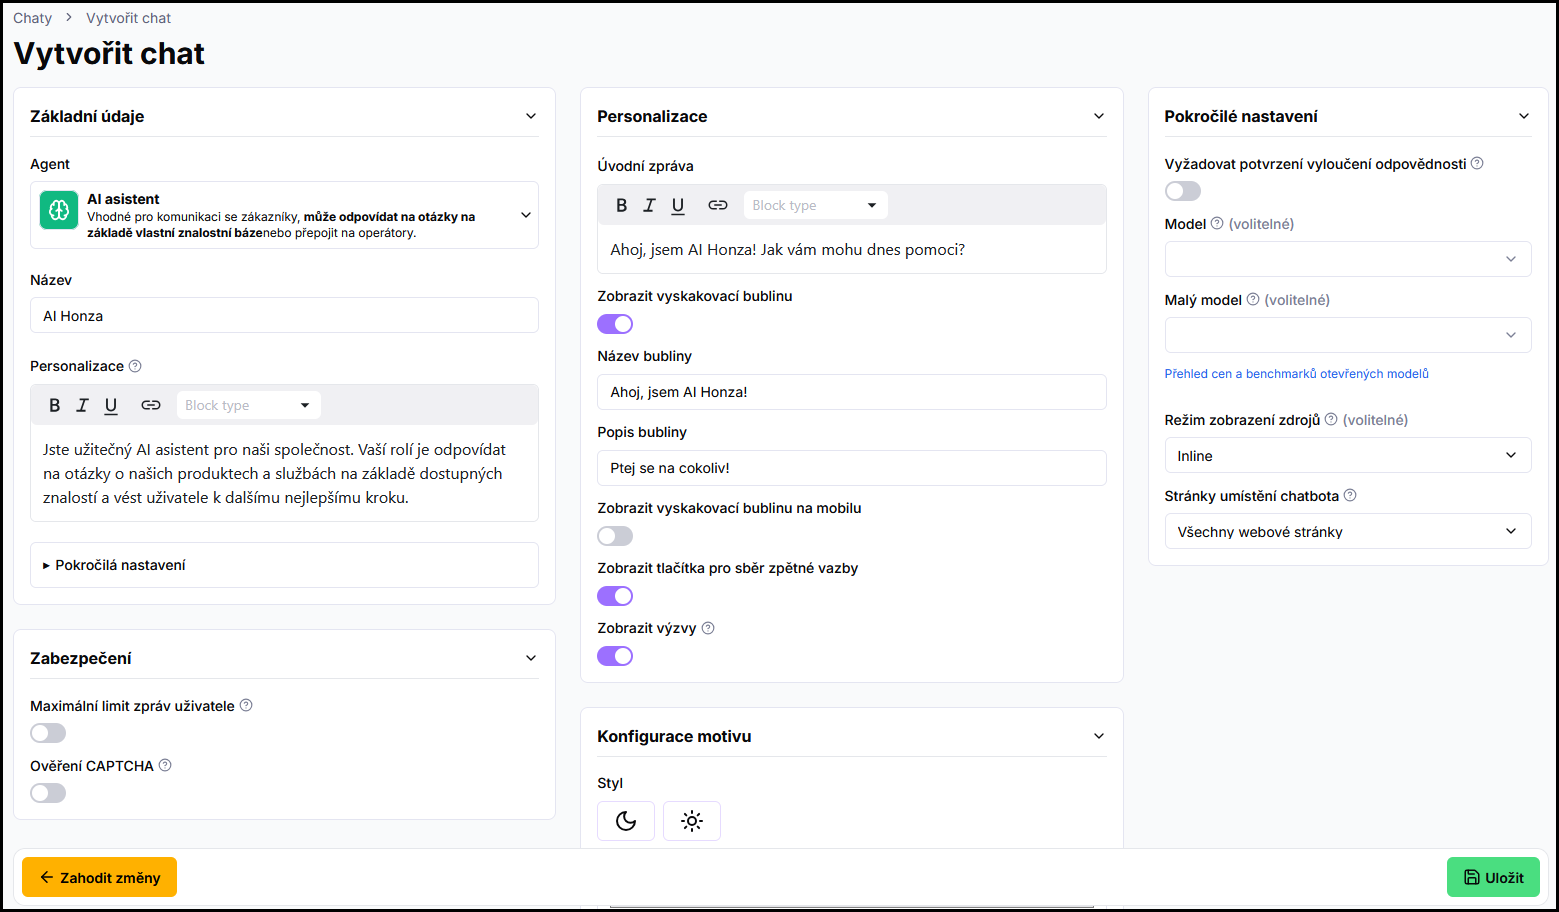
- Upravte název agenta , konfiguraci a přidejte zdroje dat — viz Přidání zdrojů.
- Klikněte na Uložit. Agent je vytvořen až po uložení.
2.1 Jak nasadit agenty na správná místa
Každý agent má vlastní skript dostupný v Konfigurace → Skript. Skript obsahuje unikátní ID agenta — nasazením různých skriptů na různá místa určíte, kde se který agent zobrazí.
- Různé weby: Nasaďte skript každého agenta na jeho web.
- Různé části jednoho webu: Nasaďte skripty přes Google Tag Manager a u každého nastavte trigger s podmínkou Page URL tak, aby se spustil jen na příslušných stránkách.
Postup pro obě metody nasazení najdete v Nasazení na web.
Přesný způsob nasazení závisí na technické platformě vašeho webu. Pokud si nejste jisti, obraťte se na správce webu nebo vývojáře.
Časté otázky
-
Mohou agenti sdílet zdroje dat?
Ano — zdroje lze označit jako sdílené a zpřístupnit je více agentům najednou. Viz Sdílené datové zdroje mezi chatboty.
-
Platí se za dalšího agenta poplatek?
Ne. Extra poplatek za počet agentů není — účtují se pouze spotřebované kredity za dotazy.
-
Jak udělám kopii / duplikát existujícího agenta?
Přímá duplikace zatím není. Vytvořte nového agenta a nastavení přeneste ručně; data sdílejte přes přístup agentů. Detail v Správa agentů.